Quality Assurance in the Automotive Industry

Image processing has become an important part of industrial production. For a number of years, test systems have been taken into account directly during the planning of a production line, instead of being installed afterwards. Surface inspection in particular has become one of the most important quality assurance measures. Especially the quality assurance and optimization sector in the automotive industry has grown considerably.

Various projects are presented below:

ABIS – Automatic Body Inspection System

To ensure a sound quality of the painted car body surface an optimal preparation of the raw car body is required. To reduce treatment of the car after painting it is necessary to recognize and treat the defects before finishing the fabrication of the raw car body.

In the project ABIS (Automatic Body Inspection System), which is promoted by the Bavarian Research Foundation, a system is being developed which is able to detect, classify, and mark the different types of defects on a raw car body. Propagation of these defects in the painting process can thereby be prevented.

For this purpose the system has been developed with these features:

  • an optical measuring system to visualize the defects, e.g. dents,
  • a software tool, using the most advanced software techniques, to recognize the surface defects is being developed,
  • a corresponding system control for automation of the individual components (measurement, recognition, classification, marking, etc.). It is an adaptive system, i.e. it collects the knowledge of an experienced inspector and converts this knowledge into objective criteria to ensure a steady high quality level.

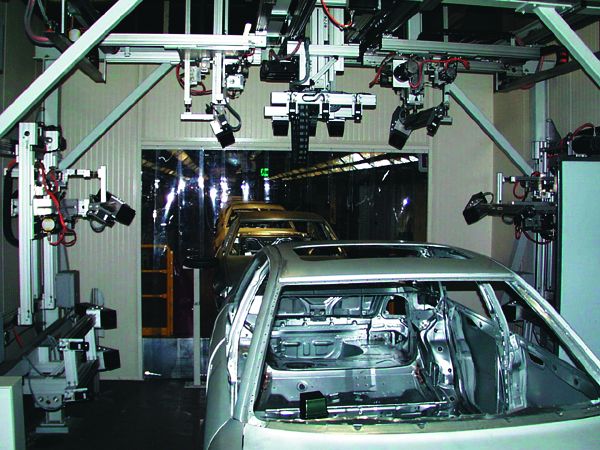
Attributes of ABIS

  • Recognition of the type of vehicle
  • Image acquisition (about 250 patches per car body)
  • Detection of patches that possibly contain defects
  • Detailed analysis of the detected patches, leading to a number of candidate defects
  • Classification of the candidate defects by means of characteristic features
  • Marking the defects on the car body in order to repair them

The part of the ITWM within this project is the detailed analysis of the detected patches with possible defects. Due to the high resolution of the images (irregularities from 40 µm are to be detected) they are strongly disturbed. Additionally, since the inspection should be done on-line, only little time for the processing of each single image is available. The following image processing tools are used for this analysis process.
 

Image Processing Steps

  • Filtering of the depth data
  • Region extraction by adaptive thresholding
  • Some morphological steps to smooth the regions, and to remove remaining noise effects
  • Characteristic features extraction for all regions
ABIS System
© Fraunhofer ITWM
ABIS System

OPAQ – Quality Control of Formed Parts in Press Shops

During the production process of free surface parts, it is impossible to avoid surface defects. In order to reduce refinishing in the painting processes and to guarantee a constant quality level, it is necessary to detect and correct surface defects as soon as possible.

The objective of the joint project OPAQ, funded by the federal ministry for education and research (BMBF), is the detection of surface defects occurring during the process of sheet metal forming. A 3D inspection system for surface control was developed which was integrated directly into the press section, so that the quality at the process boundaries have been made transparent.
 

Tasks of the Fraunhofer ITWM

  • The development within OPAQ concentrates on the field of image analysis/defect detection, as well as on the computation of defect-relevant features and pre-classification.
  • Due to the high requirements with respect to exact resolution and stability, the development of algorithms is particularly important, especially with respect to the matching of algorithms with the sensorics to be applied.
  • From the wide range of image processing tools the appropriate ones were chosen. First these tools need to be adjusted to match the sensoric. After this initialisation step the algorithms were further developed to fit the objective. The requirements of the industrial environment (e.g. stability, error control, etc.) were taken into acount.

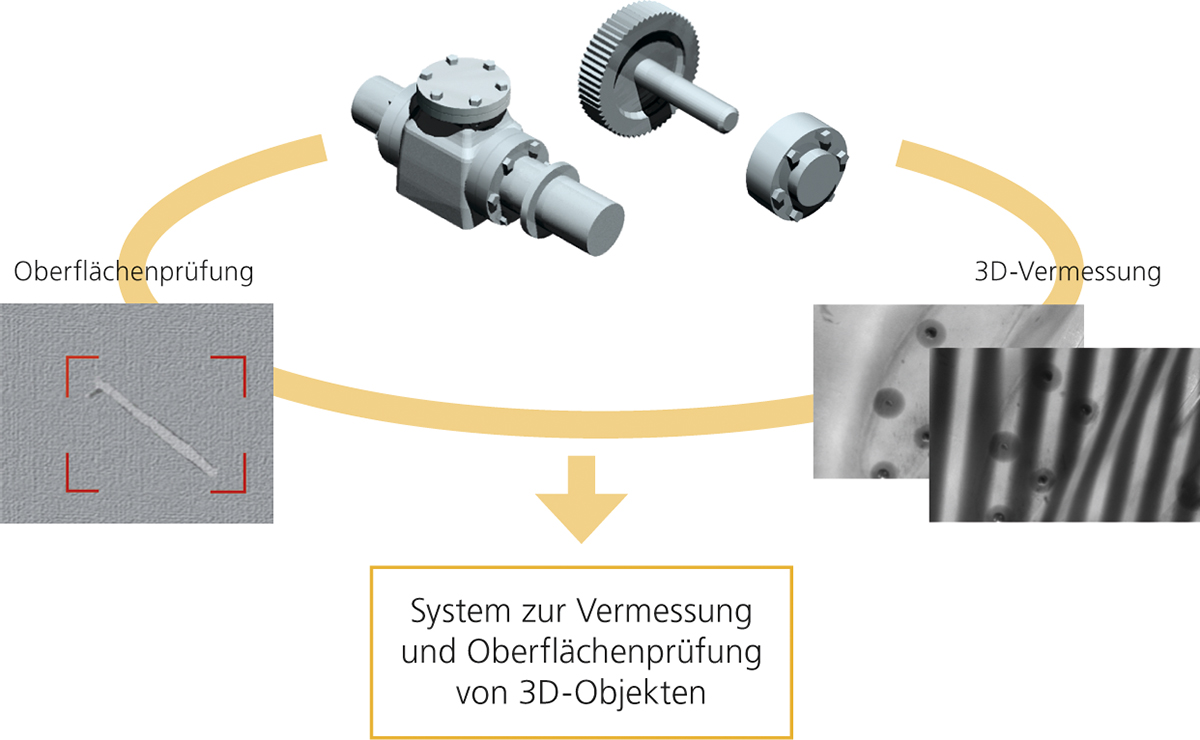
MEF – Integrated Optical Measurement and Surface Inspection on 3D Objects

Currently, techniques for contact-free optical surface measurement and inspection of 3D-objects become more and more important.

Especially in the area of quality and process control the two methods have established because they are both fast and reliable. While methods for 2D-surface control are being used for defect detection, 3D-surface measurement is mainly being used for verifying geometrical measures. Although there exist synergies that could improve the quality of both techniques they are still being applied independently.
 

Results of the Project

  • The aim of this project is to develop new methods and techniques that combine both geometrical measurement and surface inspection.
  • The main competences of both surface measurement and surface inspection have been combined by means of hardware components as well as on a software level. For instance, based on an optical geometry measurement it have been be possible to define an object-based lightning, image acquisition as well as image analysis.
  • This way surface quality control could reach a higher level opening ways for new applications.

Advantages in Comparison to Two Seperate Systems

  • Improved measurement and surface inspection by mutual image information
  • More compact construction and less integration costs
  • lower investment costs
  • faster quality checking
Basic idea of ​​combined surface inspection and 3D measurement
© Fraunhofer ITWM
Basic idea of ​​combined surface inspection and 3D measurement